![]()
Today marks the 100th blog post on PyImageSearch.
100 posts. It’s hard to believe it, but it’s true.
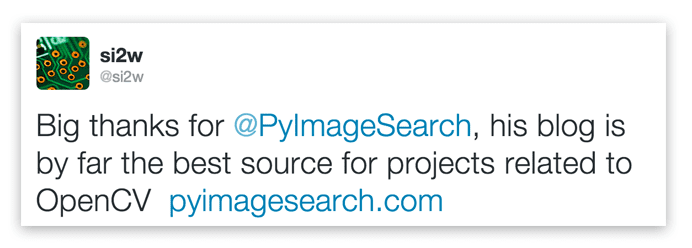
When I started PyImageSearch back in January of 2014, I had no idea what the blog would turn into. I didn’t know how it would evolve and mature. And I most certainly did not know how popular it would become. After 100 blog posts, I think the answer is obvious now, although I struggled to put it into words (ironic, since I’m a writer) until I saw this tweet from @si2w:
I couldn’t agree more. And I hope the rest of the PyImageSearch readers do as well.
It’s been an incredible ride and I really have you, the PyImageSearch readers to thank. Without you, this blog really wouldn’t have been possible.
That said, to make the 100th blog post special, I thought I would do something a fun — ball tracking with OpenCV:
The goal here is fair self-explanatory:
- Step #1: Detect the presence of a colored ball using computer vision techniques.
- Step #2: Track the ball as it moves around in the video frames, drawing its previous positions as it moves.
The end product should look similar to the GIF and video above.
After reading this blog post, you’ll have a good idea on how to track balls (and other objects) in video streams using Python and OpenCV.
Ball tracking with OpenCV
Let’s get this example started. Open up a new file, name it ball_tracking.py , and we’ll get coding:
# import the necessary packages
from collections import deque
from imutils.video import VideoStream
import numpy as np
import argparse
import cv2
import imutils
import time

# construct the argument parse and parse the arguments
ap = argparse.ArgumentParser()
ap.add_argument("-v", "--video",
	help="path to the (optional) video file")
ap.add_argument("-b", "--buffer", type=int, default=64,
	help="max buffer size")
args = vars(ap.parse_args())
Lines 2-8 handle importing our necessary packages. We’ll be using deque , a list-like data structure with super fast appends and pops to maintain a list of the past N (x, y)-locations of the ball in our video stream. Maintaining such a queue allows us to draw the “contrail” of the ball as its being tracked.
We’ll also be using imutils , my collection of OpenCV convenience functions to make a few basic tasks (like resizing) much easier. If you don’t already have imutils installed on your system, you can grab the source from GitHub or just use pip to install it:
$ pip install --upgrade imutils
From there, Lines 11-16 handle parsing our command line arguments. The first switch, --video is the (optional) path to our example video file. If this switch is supplied, then OpenCV will grab a pointer to the video file and read frames from it. Otherwise, if this switch is not supplied, then OpenCV will try to access our webcam.
If this your first time running this script, I suggest using the --video switch to start: this will demonstrate the functionality of the Python script to you, then you can modify the script, video file, and webcam access to your liking.
A second optional argument, --buffer is the maximum size of our deque , which maintains a list of the previous (x, y)-coordinates of the ball we are tracking. This deque allows us to draw the “contrail” of the ball, detailing its past locations. A smaller queue will lead to a shorter tail whereas a larger queue will create a longer tail (since more points are being tracked):
Now that our command line arguments are parsed, let’s look at some more code:
# define the lower and upper boundaries of the "green"
# ball in the HSV color space, then initialize the
# list of tracked points
greenLower = (29, 86, 6)
greenUpper = (64, 255, 255)
pts = deque(maxlen=args["buffer"])

# if a video path was not supplied, grab the reference
# to the webcam
if not args.get("video", False):
	vs = VideoStream(src=0).start()

# otherwise, grab a reference to the video file
else:
	vs = cv2.VideoCapture(args["video"])

# allow the camera or video file to warm up
time.sleep(2.0)
Lines 21 and 22 define the lower and upper boundaries of the color green in the HSV color space (which I determined using the range-detector script in the imutils library). These color boundaries will allow us to detect the green ball in our video file. Line 23 then initializes our deque of pts using the supplied maximum buffer size (which defaults to 64 ).
From there, we need to grab access to our vs pointer. If a --video switch was not supplied, then we grab reference to our webcam (Lines 27 and 28) — we use the imutils.video VideoStream threaded class for efficiency. Otherwise, if a video file path was supplied, then we open it for reading and grab a reference pointer on Lines 31 and 32 (using the built in cv2.VideoCapture ).
# keep looping
while True:
	# grab the current frame
	frame = vs.read()

	# handle the frame from VideoCapture or VideoStream
	frame = frame[1] if args.get("video", False) else frame

	# if we are viewing a video and we did not grab a frame,
	# then we have reached the end of the video
	if frame is None:
		break

	# resize the frame, blur it, and convert it to the HSV
	# color space
	frame = imutils.resize(frame, width=600)
	blurred = cv2.GaussianBlur(frame, (11, 11), 0)
	hsv = cv2.cvtColor(blurred, cv2.COLOR_BGR2HSV)

	# construct a mask for the color "green", then perform
	# a series of dilations and erosions to remove any small
	# blobs left in the mask
	mask = cv2.inRange(hsv, greenLower, greenUpper)
	mask = cv2.erode(mask, None, iterations=2)
	mask = cv2.dilate(mask, None, iterations=2)
Line 38 starts a loop that will continue until (1) we press the q key, indicating that we want to terminate the script or (2) our video file reaches its end and runs out of frames.
Line 40 makes a call to the read method of our camera pointer which returns a 2-tuple. The first entry in the tuple, grabbed is a boolean indicating whether the frame was successfully read or not. The frame is the video frame itself. Line 43 handles VideoStream vs VideoCapture implementations.
In the case we are reading from a video file and the frame is not successfully read, then we know we are at the end of the video and can break from the while loop (Lines 47 and 48).
Lines 52-54 preprocess our frame a bit. First, we resize the frame to have a width of 600px. Downsizing the frame allows us to process the frame faster, leading to an increase in FPS (since we have less image data to process). We’ll then blur the frame to reduce high frequency noise and allow us to focus on the structural objects inside the frame , such as the ball. Finally, we’ll convert the frame to the HSV color space.
Lines 59 handles the actual localization of the green ball in the frame by making a call to cv2.inRange . We first supply the lower HSV color boundaries for the color green, followed by the upper HSV boundaries. The output of cv2.inRange is a binary mask , like this one:
As we can see, we have successfully detected the green ball in the image. A series of erosions and dilations (Lines 60 and 61) remove any small blobs that may be left on the mask.
Alright, time to perform compute the contour (i.e. outline) of the green ball and draw it on our frame :
	# find contours in the mask and initialize the current
	# (x, y) center of the ball
	cnts = cv2.findContours(mask.copy(), cv2.RETR_EXTERNAL,
		cv2.CHAIN_APPROX_SIMPLE)
	cnts = imutils.grab_contours(cnts)
	center = None

	# only proceed if at least one contour was found
	if len(cnts) > 0:
		# find the largest contour in the mask, then use
		# it to compute the minimum enclosing circle and
		# centroid
		c = max(cnts, key=cv2.contourArea)
		((x, y), radius) = cv2.minEnclosingCircle(c)
		M = cv2.moments(c)
		center = (int(M["m10"] / M["m00"]), int(M["m01"] / M["m00"]))

		# only proceed if the radius meets a minimum size
		if radius > 10:
			# draw the circle and centroid on the frame,
			# then update the list of tracked points
			cv2.circle(frame, (int(x), int(y)), int(radius),
				(0, 255, 255), 2)
			cv2.circle(frame, center, 5, (0, 0, 255), -1)

	# update the points queue
	pts.appendleft(center)
We start by computing the contours of the object(s) in the image on Line 65 and 66. On the subsequent line, make the function compatible with all versions of OpenCV. You can read more about why this change to cv2.findContours is necessary in this blog post. We’ll also initialize the center (x, y)-coordinates of the ball to None on Line 68.
Line 71 makes a check to ensure at least one contour was found in the mask . Provided that at least one contour was found, we find the largest contour in the cnts list on Line 75, compute the minimum enclosing circle of the blob, and then compute the center (x, y)-coordinates (i.e. the “centroids) on Lines 77 and 78.
Line 81 makes a quick check to ensure that the radius of the minimum enclosing circle is sufficiently large. Provided that the radius passes the test, we then draw two circles: one surrounding the ball itself and another to indicate the centroid of the ball.
Finally, Line 89 appends the centroid to the pts list.
The last step is to draw the contrail of the ball, or simply the past N (x, y)-coordinates the ball has been detected at. This is also a straightforward process:
	# loop over the set of tracked points
	for i in range(1, len(pts)):
		# if either of the tracked points are None, ignore
		# them
		if pts[i - 1] is None or pts[i] is None:
			continue

		# otherwise, compute the thickness of the line and
		# draw the connecting lines
		thickness = int(np.sqrt(args["buffer"] / float(i + 1)) * 2.5)
		cv2.line(frame, pts[i - 1], pts[i], (0, 0, 255), thickness)

	# show the frame to our screen
	cv2.imshow("Frame", frame)
	key = cv2.waitKey(1) & 0xFF

	# if the 'q' key is pressed, stop the loop
	if key == ord("q"):
		break

# if we are not using a video file, stop the camera video stream
if not args.get("video", False):
	vs.stop()

# otherwise, release the camera
else:
	vs.release()

# close all windows
cv2.destroyAllWindows()
We start looping over each of the pts on Line 92. If either the current point or the previous point is None (indicating that the ball was not successfully detected in that given frame), then we ignore the current index continue looping over the pts (Lines 95 and 96).
Provided that both points are valid, we compute the thickness of the contrail and then draw it on the frame (Lines 100 and 101).
The remainder of our ball_tracking.py script simply performs some basic housekeeping by displaying the frame to our screen, detecting any key presses, and then releasing the vs pointer.
Ball tracking in action
Now that our script has been coded it up, let’s give it a try. Open up a terminal and execute the following command:
$ python ball_tracking.py --video ball_tracking_example.mp4
This command will kick off our script using the supplied ball_tracking_example.mp4 demo video. Below you can find a few animated GIFs of the successful ball detection and tracking using OpenCV:
For the full demo, please see the video below:
Finally, if you want to execute the script using your webcam rather than the supplied video file, simply omit the --video switch:
$ python ball_tracking.py
However, to see any results, you will need a green object with the same HSV color range was the one I used in this demo.
What's next? I recommend PyImageSearch University.

30+ total classes • 39h 44m video • Last updated: 12/2021
★★★★★ 4.84 (128 Ratings) • 3,000+ Students Enrolled
I strongly believe that if you had the right teacher you could master computer vision and deep learning.
Do you think learning computer vision and deep learning has to be time-consuming, overwhelming, and complicated? Or has to involve complex mathematics and equations? Or requires a degree in computer science?
That’s not the case.
All you need to master computer vision and deep learning is for someone to explain things to you in simple, intuitive terms. And that’s exactly what I do. My mission is to change education and how complex Artificial Intelligence topics are taught.
If you're serious about learning computer vision, your next stop should be PyImageSearch University, the most comprehensive computer vision, deep learning, and OpenCV course online today. Here you’ll learn how to successfully and confidently apply computer vision to your work, research, and projects. Join me in computer vision mastery.
Inside PyImageSearch University you'll find:
- ✓ 30+ courses on essential computer vision, deep learning, and OpenCV topics
- ✓ 30+ Certificates of Completion
- ✓ 39h 44m on-demand video
- ✓ Brand new courses released every month, ensuring you can keep up with state-of-the-art techniques
- ✓ Pre-configured Jupyter Notebooks in Google Colab
- ✓ Run all code examples in your web browser — works on Windows, macOS, and Linux (no dev environment configuration required!)
- ✓ Access to centralized code repos for all 500+ tutorials on PyImageSearch
- ✓ Easy one-click downloads for code, datasets, pre-trained models, etc.
- ✓ Access on mobile, laptop, desktop, etc.
Summary
In this blog post we learned how to perform ball tracking with OpenCV. The Python script we developed was able to (1) detect the presence of the colored ball, followed by (2) track and draw the position of the ball as it moved around the screen.
As the results showed, our system was quite robust and able to track the ball even if it was partially occluded from view by my hand.
Our script was also able to operate at an extremely high frame rate (> 32 FPS), indicating that color based tracking methods are very much suitable for real-time detection and tracking.
If you enjoyed this blog post, please consider subscribing to the PyImageSearch Newsletter by entering your email address in the form below — this blog (and the 99 posts preceding it) wouldn’t be possible without readers like yourself.
Download the Source Code and FREE 17-page Resource Guide
Enter your email address below to get a .zip of the code and a FREE 17-page Resource Guide on Computer Vision, OpenCV, and Deep Learning. Inside you'll find my hand-picked tutorials, books, courses, and libraries to help you master CV and DL!

