
Did you know that the human eye perceives color and luminance differently than the sensor on your smartphone or digital camera?
You see, when twice the number of photons hit the sensor of a digital camera, it receives twice the signal (a linear relationship). However, that’s not how our human eyes work. Instead, we perceive double the amount of light as only a fraction brighter (a non-linear relationship)! Furthermore, our eyes are also much more sensitive to changes in dark tones than brighter tones (another non-linear relationship).
In order to account for this we can apply gamma correction, a translation between the sensitivity of our eyes and sensors of a camera.
In the remainder of this post I’ll demonstrate how you can implement a super fast, dead-simple gamma correction function using Python and OpenCV.
Gamma correction and the Power Law Transform
Gamma correction is also known as the Power Law Transform. First, our image pixel intensities must be scaled from the range [0, 255] to [0, 1.0]. From there, we obtain our output gamma corrected image by applying the following equation:
O = I ^ (1 / G)
Where I is our input image and G is our gamma value. The output image O is then scaled back to the range [0, 255].
Gamma values < 1 will shift the image towards the darker end of the spectrum while gamma values > 1 will make the image appear lighter. A gamma value of G=1 will have no affect on the input image:

OpenCV Gamma Correction
Now that we understand what gamma correction is, let’s use OpenCV and Python to implement it. Open up a new file, name it adjust_gamma.py , and we’ll get started:
# import the necessary packages
from __future__ import print_function
import numpy as np
import argparse
import cv2

def adjust_gamma(image, gamma=1.0):
	# build a lookup table mapping the pixel values [0, 255] to
	# their adjusted gamma values
	invGamma = 1.0 / gamma
	table = np.array([((i / 255.0) ** invGamma) * 255
		for i in np.arange(0, 256)]).astype("uint8")

	# apply gamma correction using the lookup table
	return cv2.LUT(image, table)
Lines 2-5 simply import our necessary packages, nothing special here.
We define our adjust_gamma function on Line 7. This method requires a single parameter, image , which is the image we want to apply gamma correction to. A second (optional) value is our gamma value. In this case, we default gamma=1.0 , but you should supply whatever value is necessary to obtain a decent looking corrected image.
There are two (easy) ways to apply gamma correction using OpenCV and Python. The first method is to simply leverage the fact that Python + OpenCV represents images as NumPy arrays. All we need to do is scale the pixel intensities to the range [0, 1.0], apply the transform, and then scale back to the range [0, 255]. Overall, the NumPy approach involves a division, raising to a power, followed by a multiplication — this tends to be very fast since all these operations are vectorized.
However, there is an even faster way to perform gamma correction thanks to OpenCV. All we need to do is build a table (i.e. dictionary) that maps the input pixel values to the output gamma corrected values. OpenCV can then take this table and quickly determine the output value for a given pixel in O(1) time.
For example, here is an example lookup table for gamma=1.2 :
0 => 0
1 => 2
2 => 4
3 => 6
4 => 7
5 => 9
6 => 11
7 => 12
8 => 14
9 => 15
10 => 17
The left column is the input pixel value while the right column is the output pixel value after applying the power law transform.
Lines 11 and 12 build this lookup table by looping over all pixel values in the range [0, 255]. The pixel value is then scaled to the range [0, 1.0] followed by being raised to the power of the inverse gamma — this value is then stored in the table .
Lastly, all we need to do is apply the cv2.LUT function (Line 15) to take the input image and the table and find the correct mappings for each pixel value — it’s a simple (and yet very speedy) operation!
Let’s continue on with our example:
# construct the argument parse and parse the arguments
ap = argparse.ArgumentParser()
ap.add_argument("-i", "--image", required=True,
	help="path to input image")
args = vars(ap.parse_args())

# load the original image
original = cv2.imread(args["image"])
Lines 17-21 handle parsing command line arguments. We only need a single switch here, --image , which is the path to where our input image resides on disk. Line 24 takes the path to our image and loads it.
Let’s explore gamma correction by using a variety of gamma values and inspecting the output image for each:
# loop over various values of gamma
for gamma in np.arange(0.0, 3.5, 0.5):
	# ignore when gamma is 1 (there will be no change to the image)
	if gamma == 1:
		continue

	# apply gamma correction and show the images
	gamma = gamma if gamma > 0 else 0.1
	adjusted = adjust_gamma(original, gamma=gamma)
	cv2.putText(adjusted, "g={}".format(gamma), (10, 30),
		cv2.FONT_HERSHEY_SIMPLEX, 0.8, (0, 0, 255), 3)
	cv2.imshow("Images", np.hstack([original, adjusted]))
	cv2.waitKey(0)
On Line 27 we start by looping over gamma values in the range [0, 3.0] (the np.arange function is non-inclusive), incrementing by 0.5 at each step.
In the case that our gamma value is 1.0, we simply ignore it (Lines 29 and 30) since gamma=1.0 will not change our input image.
From there, Lines 33-38 apply gamma correction to our image and display the output result.
To see gamma correction in action, just open up a terminal and execute the following command:
$ python adjust_gamma.py --image example_01.png

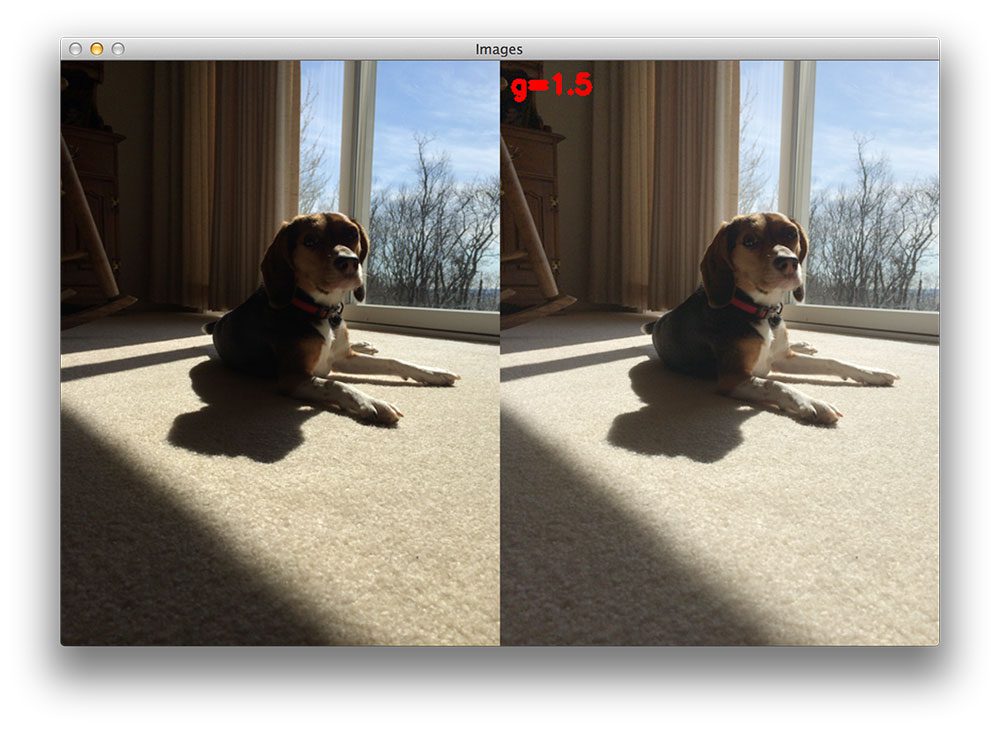
Notice for gamma=0.5 that the gamma corrected image (right) is substantially darker than the input image (left) which is already quite dark — we can barely see any detail on the dog’s face in the original yet, let alone the gamma corrected version!
However, at gamma=1.5 the image starts to lighten up and we can see more detail:
By the time we reach gamma=2.0 , the details in the image are fully visible.
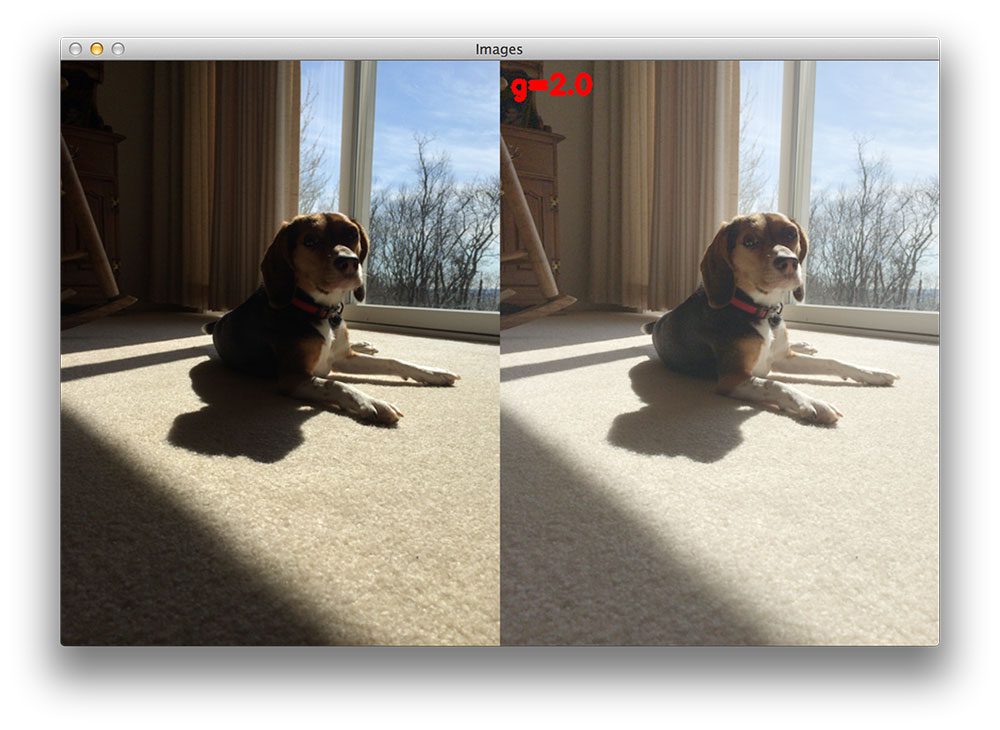
Although at gamma=2.5 , the image starts to appear “washed out”:

Let’s give another image a try:
$ python adjust_gamma.py --image example_02.png
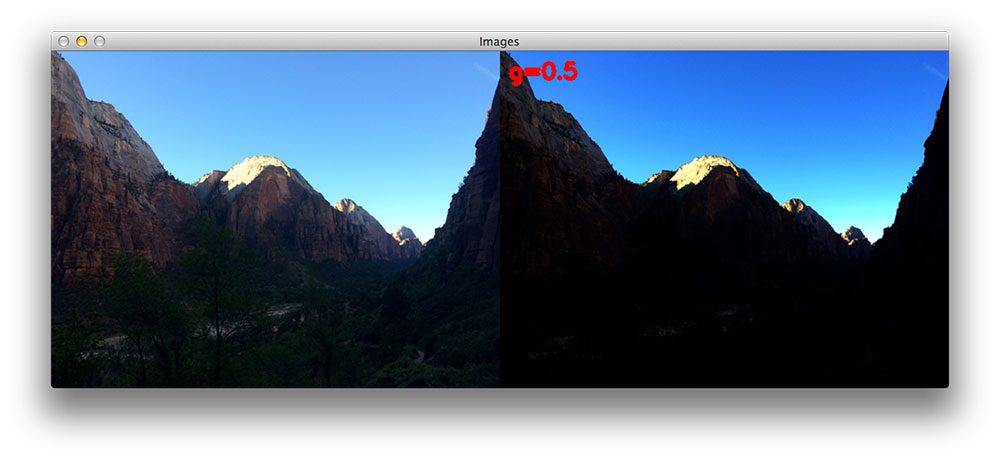
Just like in example_01.png , a gamma value of 0.5 makes the input image appear darker than it already is. We can’t really make out any detail in this image, other than there is sky and what appears to be a mountain range.
However, this changes when we apply gamma correction with gamma=1.5 :
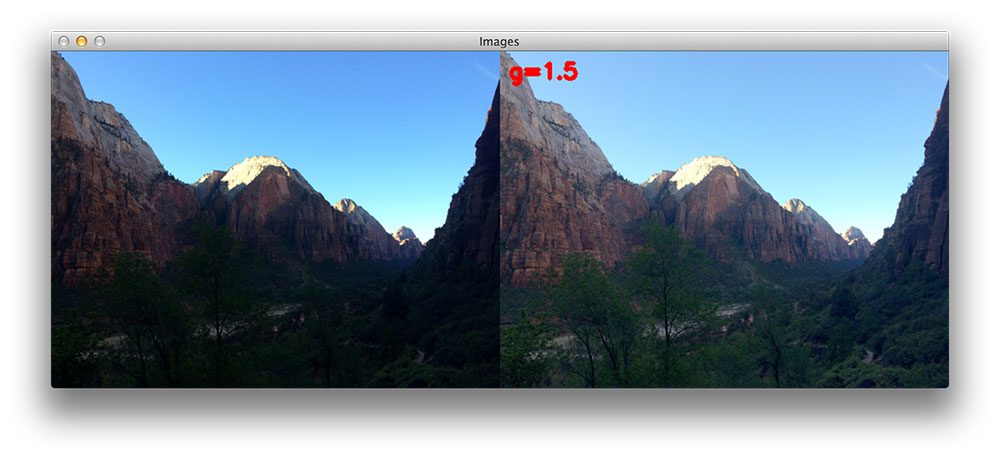
Now we can see that the image has become much lighter — we can even start to see there are trees in the foreground, something that is not entirely apparent from the original input image on the left.
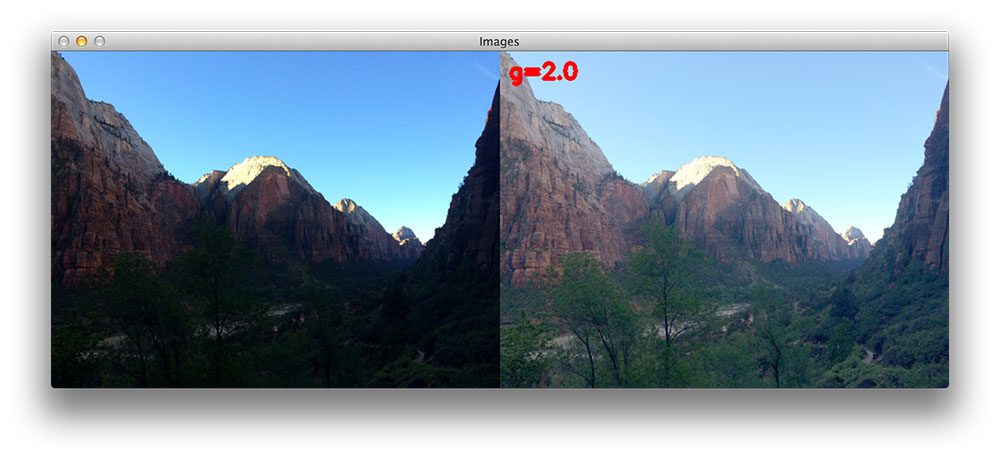
At gamma=2.0 the image starts to appear washed out, but again, the difference between the original image and the gamma corrected image is quite substantial:
What's next? I recommend PyImageSearch University.
30+ total classes • 39h 44m video • Last updated: 12/2021
★★★★★ 4.84 (128 Ratings) • 3,000+ Students Enrolled
I strongly believe that if you had the right teacher you could master computer vision and deep learning.
Do you think learning computer vision and deep learning has to be time-consuming, overwhelming, and complicated? Or has to involve complex mathematics and equations? Or requires a degree in computer science?
That’s not the case.
All you need to master computer vision and deep learning is for someone to explain things to you in simple, intuitive terms. And that’s exactly what I do. My mission is to change education and how complex Artificial Intelligence topics are taught.
If you're serious about learning computer vision, your next stop should be PyImageSearch University, the most comprehensive computer vision, deep learning, and OpenCV course online today. Here you’ll learn how to successfully and confidently apply computer vision to your work, research, and projects. Join me in computer vision mastery.
Inside PyImageSearch University you'll find:
- ✓ 30+ courses on essential computer vision, deep learning, and OpenCV topics
- ✓ 30+ Certificates of Completion
- ✓ 39h 44m on-demand video
- ✓ Brand new courses released every month, ensuring you can keep up with state-of-the-art techniques
- ✓ Pre-configured Jupyter Notebooks in Google Colab
- ✓ Run all code examples in your web browser — works on Windows, macOS, and Linux (no dev environment configuration required!)
- ✓ Access to centralized code repos for all 500+ tutorials on PyImageSearch
- ✓ Easy one-click downloads for code, datasets, pre-trained models, etc.
- ✓ Access on mobile, laptop, desktop, etc.
Summary
In this blog post we learned about gamma correction, also called the Power Law Transform. We then implemented gamma correction using Python and OpenCV.
The reason we apply gamma correction is because our eyes perceive color and luminance differently than the sensors in a digital camera. When a sensor on a digital camera picks up twice the amount of photons, the signal is doubled. However, our eyes do not work like this. Instead, our eyes perceive double the amount of light as only a fraction brighter. Thus, while a digital camera has a linear relationship between brightness our eyes have a non-linear relationship. In order to account for this relationship we apply gamma correction.
Be sure to download the code to this post and try applying gamma correction to your own photos. Try to go through your photo collection and find images that are either excessively dark or very bright and washed out. Then perform gamma correction on these images and see if they become more visually appealing.

Download the Source Code and FREE 17-page Resource Guide
Enter your email address below to get a .zip of the code and a FREE 17-page Resource Guide on Computer Vision, OpenCV, and Deep Learning. Inside you'll find my hand-picked tutorials, books, courses, and libraries to help you master CV and DL!

