In this tutorial, you will learn how to configure your Google Coral TPU USB Accelerator on Raspberry Pi and Ubuntu. You’ll then learn how to perform classification and object detection using Google Coral’s USB Accelerator.
A few weeks ago, Google released “Coral”, a super fast, “no internet required” development board and USB accelerator that enables deep learning practitioners to deploy their models “on the edge” and “closer to the data”.
Using Coral, deep learning developers are no longer required to have an internet connection, meaning that the Coral TPU is fast enough to perform inference directly on the device rather than sending the image/frame to the cloud for inference and prediction.
The Google Coral comes in two flavors:
- A single-board computer with an onboard Edge TPU. The dev board could be thought of an “advanced Raspberry Pi for AI” or a competitor to NVIDIA’s Jetson Nano.
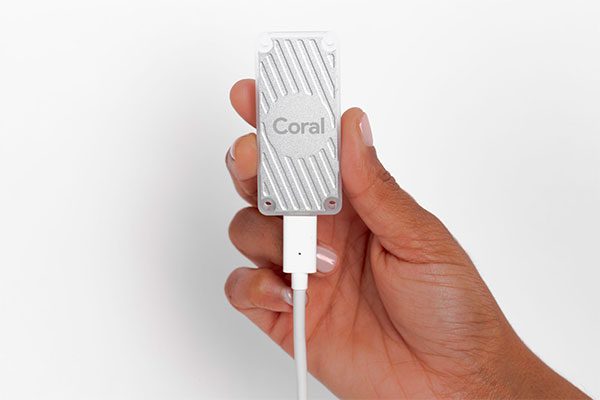
- A USB accelerator that plugs into a device (such as a Raspberry Pi). The USB stick includes an Edge TPU built into it. Think of Google’s Coral USB Accelerator as a competitor to Intel’s Movidius NCS.
Today we’ll be focusing on the Coral USB Accelerator as it’s easier to get started with (and it fits nicely with our theme of Raspberry Pi-related posts the past few weeks).
To learn how to configure your Google Coral USB Accelerator (and perform classification + object detection), just keep reading!
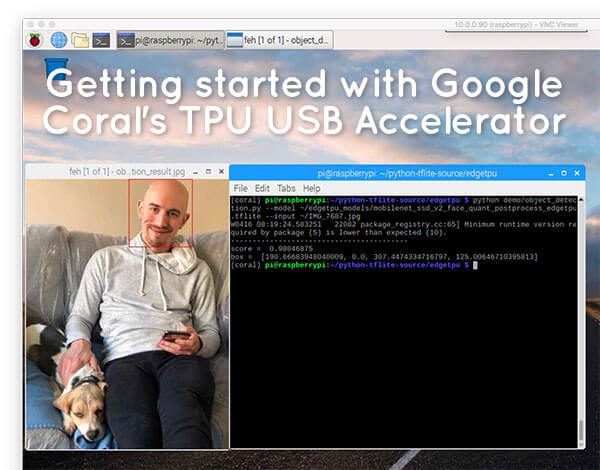
Getting started with Google Coral’s TPU USB Accelerator
In this post I’ll be assuming that you have:
- Your Google Coral USB Accelerator stick
- A fresh install of a Debian-based Linux distribution (i.e., Raspbian, Ubuntu, etc.)
- Understand basic Linux commands and file paths
If you don’t already own a Google Coral Accelerator, you can purchase one via Google’s official website.
I’ll be configuring the Coral USB Accelerator on Raspbian, but again, provided that you have a Debian-based OS, these commands will still work.
Let’s get started!
Update 2019-12-30: Installation steps 1-6 have been completely refactored and updated to align with Google’s recommended instructions for installing Coral’s EdgeTPU runtime library. My main contribution is the addition of Python virtual environments. I’ve also updated the section on how to run the example scripts.
Step #1: Installing the Coral EdgeTPU Runtime and Python API
In this step, we will use your Aptitude package manager to install Google Coral’s Debian/Raspbian-compatible package.
First, let’s add the package repository:
$ echo "deb https://packages.cloud.google.com/apt coral-edgetpu-stable main" | sudo tee /etc/apt/sources.list.d/coral-edgetpu.list
$ curl https://packages.cloud.google.com/apt/doc/apt-key.gpg | sudo apt-key add -
$ sudo apt-get update
Note: Be careful with the line-wrapping and ensure that you copy each full command + enter in your terminal as shown.
Now we’re ready to install the EdgeTPU runtime library:
$ sudo apt-get install libedgetpu1-std
Followed by installing the EdgeTPU Python API:
$ sudo apt-get install python3-edgetpu
Step #2: Reboot your device
Rebooting your Raspberry Pi or computer is critical for the installation to complete. You can use the following command:
$ sudo reboot now
Step #3: Setting up your Google Coral virtual environment
We’ll be using Python virtual environments, a best practice when working with Python.
A Python virtual environment is an isolated development/testing/production environment on your system — it is fully sequestered from other environments. Best of all, you can manage the Python packages inside your your virtual environment inside with pip (Python’s package manager).
Of course, there are alternatives for managing virtual environments and packages (namely Anaconda/conda and venv). I’ve used/tried them all, but have settled on pip, virtualenv, and virtualenvwrapper as the preferred tools that I install on all of my systems. If you use the same tools as me, you’ll receive the best support from me.
You can install pip using the following commands:
$ wget https://bootstrap.pypa.io/get-pip.py
$ sudo python get-pip.py
$ sudo python3 get-pip.py
$ sudo rm -rf ~/.cache/pip
Let’s install virtualenv and virtualenvwrapper now:
$ sudo pip install virtualenv virtualenvwrapper
Once both virtualenv and virtualenvwrapper have been installed, open up your ~/.bashrc file:
$ nano ~/.bashrc
…and append the following lines to the bottom of the file:
# virtualenv and virtualenvwrapper
export WORKON_HOME=$HOME/.virtualenvs
export VIRTUALENVWRAPPER_PYTHON=/usr/bin/python3
source /usr/local/bin/virtualenvwrapper.sh
Save and exit via ctrl + x , y , enter .
From there, reload your ~/.bashrc file to apply the changes to your current bash session:
$ source ~/.bashrc
Next, create your Python 3 virtual environment:
$ mkvirtualenv coral -p python3
Here we are creating a Python virtual environment named coral using Python 3. Going forward, I recommend Python 3.
Note: Python 3 will reach end of its life on January 1st, 2020 so I do not recommend using Python 2.7.
Step #4: Sym-link the EdgeTPU runtime into your coral virtual environment
A symbolic link is a virtual link from one file/folder to another file/folder. You can learn more on Wikipedia’s article.
We will create a symbolic link from the system packages folder containing the EdgeTPU runtime library to our virtual environment.
First, let’s find the path where the Python EdgeTPU package is installed:
$ dpkg -L python3-edgetpu
/.
/usr
/usr/lib
/usr/lib/python3
/usr/lib/python3/dist-packages
/usr/lib/python3/dist-packages/edgetpu
/usr/lib/python3/dist-packages/edgetpu/__init__.py
/usr/lib/python3/dist-packages/edgetpu/basic
/usr/lib/python3/dist-packages/edgetpu/basic/__init__.py
/usr/lib/python3/dist-packages/edgetpu/basic/basic_engine.py
/usr/lib/python3/dist-packages/edgetpu/basic/edgetpu_utils.py
/usr/lib/python3/dist-packages/edgetpu/classification
/usr/lib/python3/dist-packages/edgetpu/classification/__init__.py
/usr/lib/python3/dist-packages/edgetpu/classification/engine.py
/usr/lib/python3/dist-packages/edgetpu/detection
/usr/lib/python3/dist-packages/edgetpu/detection/__init__.py
/usr/lib/python3/dist-packages/edgetpu/detection/engine.py
/usr/lib/python3/dist-packages/edgetpu/learn
/usr/lib/python3/dist-packages/edgetpu/learn/__init__.py
/usr/lib/python3/dist-packages/edgetpu/learn/backprop
/usr/lib/python3/dist-packages/edgetpu/learn/backprop/__init__.py
/usr/lib/python3/dist-packages/edgetpu/learn/backprop/ops.py
/usr/lib/python3/dist-packages/edgetpu/learn/backprop/softmax_regression.py
/usr/lib/python3/dist-packages/edgetpu/learn/imprinting
/usr/lib/python3/dist-packages/edgetpu/learn/imprinting/__init__.py
/usr/lib/python3/dist-packages/edgetpu/learn/imprinting/engine.py
/usr/lib/python3/dist-packages/edgetpu/learn/utils.py
/usr/lib/python3/dist-packages/edgetpu/swig
/usr/lib/python3/dist-packages/edgetpu/swig/__init__.py
/usr/lib/python3/dist-packages/edgetpu/swig/_edgetpu_cpp_wrapper.cpython-35m-arm-linux-gnueabihf.so
/usr/lib/python3/dist-packages/edgetpu/swig/_edgetpu_cpp_wrapper.cpython-36m-arm-linux-gnueabihf.so
/usr/lib/python3/dist-packages/edgetpu/swig/_edgetpu_cpp_wrapper.cpython-37m-arm-linux-gnueabihf.so
/usr/lib/python3/dist-packages/edgetpu/swig/edgetpu_cpp_wrapper.py
/usr/lib/python3/dist-packages/edgetpu/utils
/usr/lib/python3/dist-packages/edgetpu/utils/__init__.py
/usr/lib/python3/dist-packages/edgetpu/utils/dataset_utils.py
/usr/lib/python3/dist-packages/edgetpu/utils/image_processing.py
/usr/lib/python3/dist-packages/edgetpu/utils/warning.py
/usr/lib/python3/dist-packages/edgetpu-2.12.2.egg-info
/usr/lib/python3/dist-packages/edgetpu-2.12.2.egg-info/PKG-INFO
/usr/lib/python3/dist-packages/edgetpu-2.12.2.egg-info/dependency_links.txt
/usr/lib/python3/dist-packages/edgetpu-2.12.2.egg-info/requires.txt
/usr/lib/python3/dist-packages/edgetpu-2.12.2.egg-info/top_level.txt
/usr/share
/usr/share/doc
/usr/share/doc/python3-edgetpu
/usr/share/doc/python3-edgetpu/changelog.Debian.gz
/usr/share/doc/python3-edgetpu/copyright
Notice in the command’s output on Line 7 that we have found the root directory of the edgetpu library to be: /usr/lib/python3/dist-packages/edgetpu. We will create a sym-link to that path from our virtual environment site-packages.
Let’s create our sym-link now:
$ cd ~/.virtualenvs/coral/lib/python3.7/site-packages
$ ln -s /usr/lib/python3/dist-packages/edgetpu/ edgetpu
$ cd ~
Step #5: Test your Coral EdgeTPU installation
Let’s fire up a Python shell to test our Google Coral installation:
$ workon coral
$ python
>>> import edgetpu
>>> edgetpu.__version__
'2.12.2'
Step #5b: Optional Python packages you may wish to install for the Google Coral
As you go down the path of working with your Google Coral, you’ll find that you need a handful of other packages installed in your virtual environment.
Let’s install packages for working with the PiCamera (Raspberry Pi only) and image processing:
$ workon coral
$ pip install "picamera[array]" # Raspberry Pi only
$ pip install numpy
$ pip install opencv-contrib-python==4.1.0.25
$ pip install imutils
$ pip install scikit-image
$ pip install pillow
Step #6: Install EdgeTPU examples
Now that we’ve installed the TPU runtime library, let’s put the Coral USB Accelerator to the test!
First let’s install the EdgeTPU Examples package:
$ sudo apt-get install edgetpu-examples
From there, we’ll need to add write permissions to the examples directory:
$ sudo chmod a+w /usr/share/edgetpu/examples
Project Structure
The examples for today’s tutorial are self-contained and do not require an additional download.
Go ahead and activate your environment and change into the examples directory:
$ workon coral
$ cd /usr/share/edgetpu/examples
The examples directory contains directories for images and models along with a selection of Python scripts. Let’s inspect our project structure with the tree command:
$ tree --dirsfirst
.
├── images
│   ├── bird.bmp
│   ├── cat.bmp
│   ├── COPYRIGHT
│   ├── grace_hopper.bmp
│   ├── parrot.jpg
│   └── sunflower.bmp
├── models
│   ├── coco_labels.txt
│   ├── deeplabv3_mnv2_pascal_quant_edgetpu.tflite
│   ├── inat_bird_labels.txt
│   ├── mobilenet_ssd_v1_coco_quant_postprocess_edgetpu.tflite
│   ├── mobilenet_ssd_v2_coco_quant_postprocess_edgetpu.tflite
│   ├── mobilenet_ssd_v2_face_quant_postprocess_edgetpu.tflite
│   └── mobilenet_v2_1.0_224_inat_bird_quant_edgetpu.tflite
├── backprop_last_layer.py
├── classify_capture.py
├── classify_image.py
├── imprinting_learning.py
├── object_detection.py
├── semantic_segmetation.py
└── two_models_inference.py

2 directories, 20 files
We will be using the following MobileNet-based TensorFlow Lite models in the next section:
mobilenet_v2_1.0_224_inat_bird_quant_edgetpu.tflite: Classification model trained on the iNaturalist (iNat) Birds dataset.mobilenet_ssd_v2_face_quant_postprocess_edgetpu.tflite: Face detection model.mobilenet_ssd_v2_coco_quant_postprocess_edgetpu.tflite: Object detection model trained on the COCO dataset.
The first model will be used with the classify_image.py classification Python script.
Both models 2 and 3 will be used with the object_detection.py Python script for object detection. Keep in mind that face detection is a form of object detection.
Classification, object detection, and face detection using the Google Coral USB Accelerator
At this point we are ready to put our Google Coral coprocessor to the test!
Let’s start by performing a simple image classification example:
$ python classify_image.py \
	--mode models/mobilenet_v2_1.0_224_inat_bird_quant_edgetpu.tflite \
	--label models/inat_bird_labels.txt \
	--image images/parrot.jpg
---------------------------
Ara macao (Scarlet Macaw)
Score :  0.61328125
---------------------------
Platycercus elegans (Crimson Rosella)
Score :  0.15234375

As you can see, MobileNet (trained on iNat Birds) has correctly labeled the image as “Macaw”, a type of parrot.
Let’s try a second classification example:
$ python classify_image.py \
	--mode models/mobilenet_v2_1.0_224_inat_bird_quant_edgetpu.tflite \
	--label models/inat_bird_labels.txt \
	--image images/bird.bmp
---------------------------
Poecile carolinensis (Carolina Chickadee)
Score :  0.37109375
---------------------------
Poecile atricapillus (Black-capped Chickadee)
Score :  0.29296875
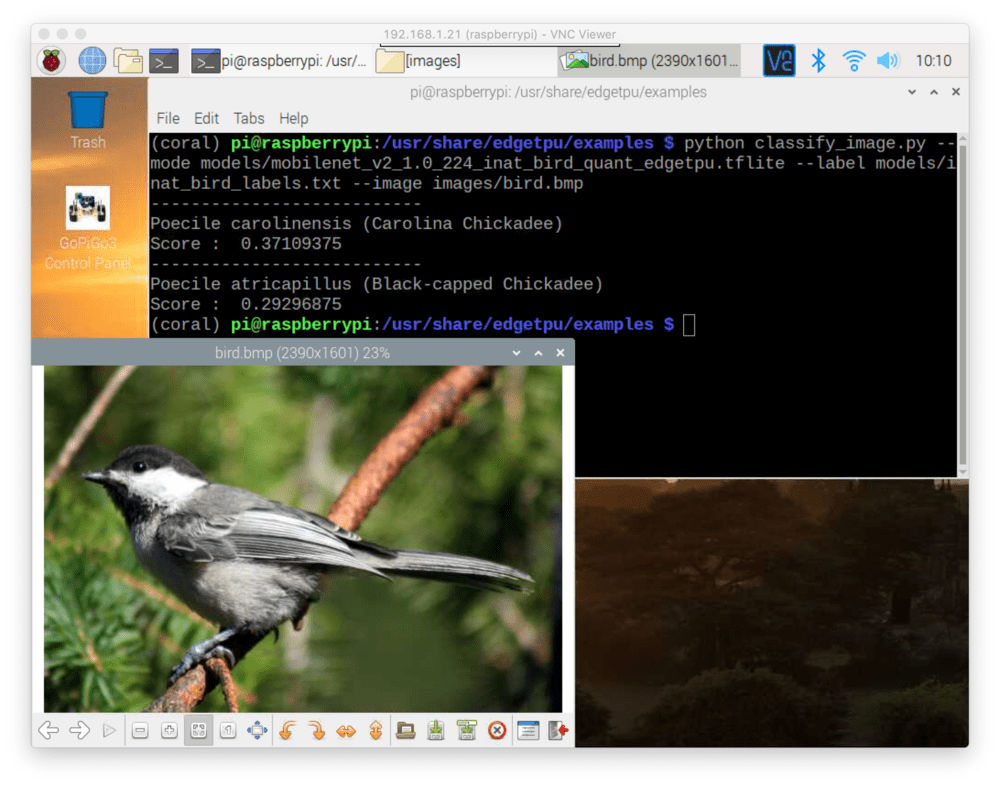
Notice that the image of the Chickadee has been correctly classified. In fact, the top two results are both forms of Chickadees: (1) Carolina, and (2) Black-capped.
Now let’s try performing face detection using the Google Coral USB Accelerator:
$ python object_detection.py \
	--mode models/mobilenet_ssd_v2_face_quant_postprocess_edgetpu.tflite \
	--input images/grace_hopper.bmp
-----------------------------------------
score =  0.99609375
box =  [143.88912090659142, 40.834905445575714, 381.8060402870178, 365.49142384529114]
Please check  object_detection_result.jpg
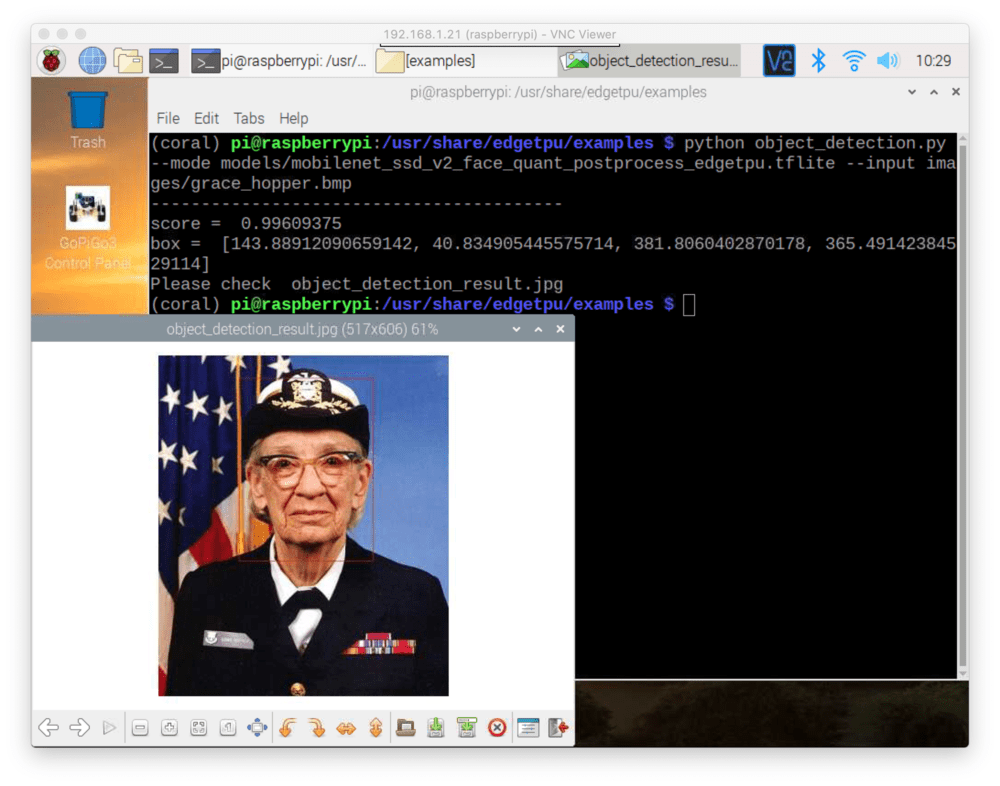
Here the MobileNet + SSD face detector was able to detect Grace Hopper’s face in the image. There is a very faint red box around Grace’s face (I recommend clicking the image to enlarge it so that you can see the face detection box). In the future, we will learn how to perform custom object detection during which time you can draw a thicker detection box.
The next example shows how to perform object detection using a MobileNet + SSD trained on the COCO dataset:
$ python object_detection.py \
	--mode models/mobilenet_ssd_v2_coco_quant_postprocess_edgetpu.tflite \
	--input images/cat.bmp
-----------------------------------------
score =  0.96484375
box =  [52.70467400550842, 37.87856101989746, 448.4963893890381, 391.3172245025635]
-----------------------------------------
score =  0.2109375
box =  [0.0, 0.5118846893310547, 191.08786582946777, 194.69362497329712]
-----------------------------------------
score =  0.2109375
box =  [300.4741072654724, 38.08128833770752, 382.5985550880432, 169.52738761901855]
-----------------------------------------
score =  0.16015625
box =  [359.85671281814575, 46.61980867385864, 588.858425617218, 357.5845241546631]
-----------------------------------------
score =  0.16015625
box =  [0.0, 10.966479778289795, 191.53071641921997, 378.33733558654785]
-----------------------------------------
score =  0.12109375
box =  [126.62454843521118, 4.192984104156494, 591.4307713508606, 262.3262882232666]
-----------------------------------------
score =  0.12109375
box =  [427.05928087234497, 84.77717638015747, 600.0, 332.24596977233887]
-----------------------------------------
score =  0.08984375
box =  [258.74093770980835, 3.4015893936157227, 600.0, 215.32137393951416]
-----------------------------------------
score =  0.08984375
box =  [234.9416971206665, 33.762264251708984, 594.8572397232056, 383.5402488708496]
-----------------------------------------
score =  0.08984375
box =  [236.90505623817444, 51.90783739089966, 407.265830039978, 130.80371618270874]
Please check  object_detection_result.jpg
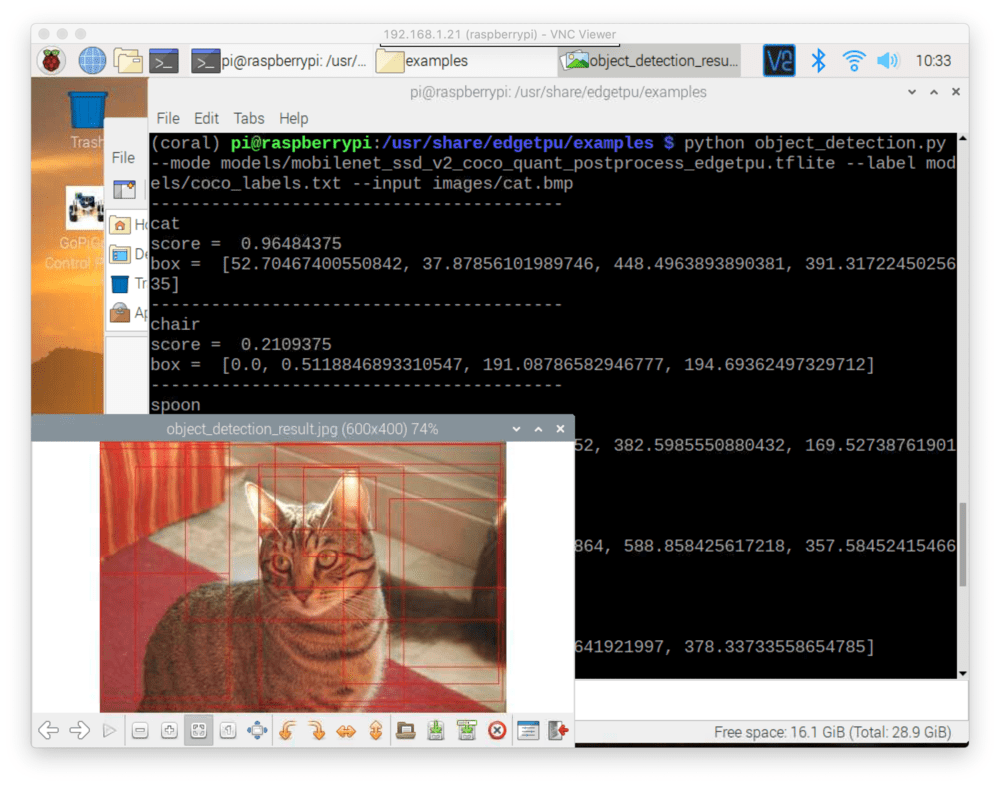
Notice there are ten detections in Figure 5 (faint red boxes; click to enlarge), but only one cat in the image — why is that?
The reason is that the object_detection.py script is not filtering on a minimum probability. You could easily modify the script to ignore detections with < 50% probability (we’ll work on custom object detection with the Google coral next month).
For fun, I decided to try an image that was not included in the example TPU runtime library demos.
Here’s an example of applying the face detector to a custom image:
$ python object_detection.py \
    --mode models/mobilenet_ssd_v2_face_quant_postprocess_edgetpu.tflite \
    --input ~/IMG_7687.jpg
-----------------------------------------
score =  0.98046875
box =  [190.66683948040009, 0.0, 307.4474334716797, 125.00646710395813]
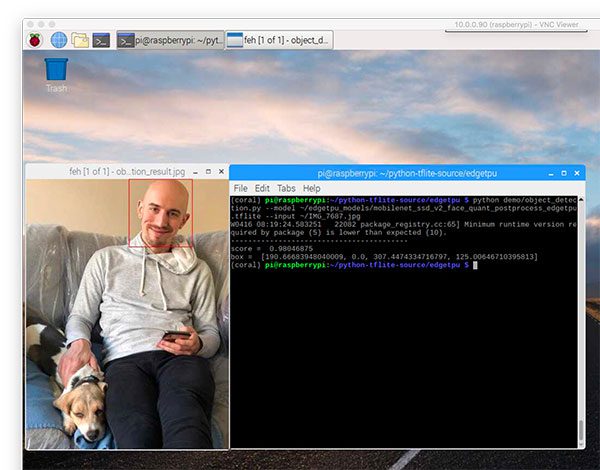
Sure enough, my face is detected!
Finally, here’s an example of running the MobileNet + SSD on the same image:
$ python object_detection.py \
    --mode models/mobilenet_ssd_v2_coco_quant_postprocess_edgetpu.tflite \
    --label models/coco_labels.txt \
    --input ~/IMG_7687.jpg
-----------------------------------------
person
score =  0.87890625
box =  [58.70787799358368, 10.639026761054993, 371.2196350097656, 494.61638927459717]
-----------------------------------------
dog
score =  0.58203125
box =  [50.500258803367615, 358.102411031723, 162.57299482822418, 500.0]
-----------------------------------------
dog
score =  0.33984375
box =  [13.502731919288635, 287.04309463500977, 152.83603966236115, 497.8201985359192]
-----------------------------------------
couch
score =  0.26953125
box =  [0.0, 88.88640999794006, 375.0, 423.55993390083313]
-----------------------------------------
couch
score =  0.16015625
box =  [3.753773868083954, 64.79595601558685, 201.68977975845337, 490.678071975708]
-----------------------------------------
dog
score =  0.12109375
box =  [65.94736874103546, 335.2701663970947, 155.95845878124237, 462.4992609024048]
-----------------------------------------
dog
score =  0.12109375
box =  [3.5936199128627777, 335.3758156299591, 118.05401742458344, 497.33099341392517]
-----------------------------------------
couch
score =  0.12109375
box =  [49.873560667037964, 97.65596687793732, 375.0, 247.15487658977509]
-----------------------------------------
dog
score =  0.12109375
box =  [92.47469902038574, 338.89272809028625, 350.16247630119324, 497.23270535469055]
-----------------------------------------
couch
score =  0.12109375
box =  [20.54794132709503, 99.93192553520203, 375.0, 369.604617357254]
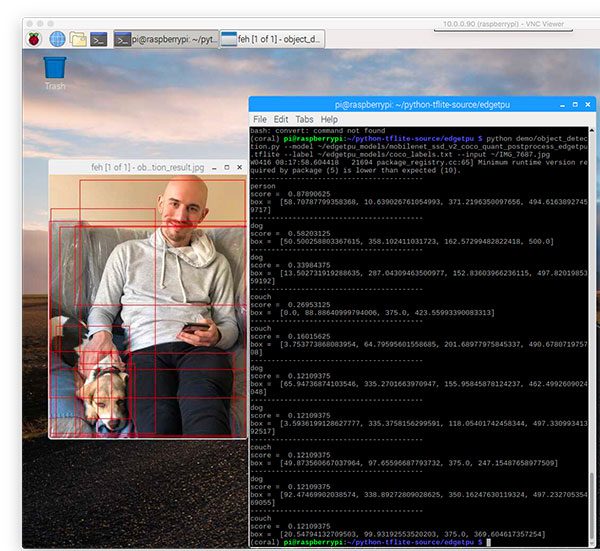
Again, we can improve results by filtering on a minimum probability to remove the extraneous detections. Doing so would leave only two detections: person (87.89%) and dog (58.20%).
What about training custom models for the Google’s Coral?
You’ll notice that I’m only using pre-trained deep learning models on the Google Coral in this post — what about custom models that you train yourself?
Google does provide some documentation on that but it’s much more advanced, far too much for me to include in this blog post.
If you’re interested in learning how to train your own custom models for Google’s Coral I would recommend you take a look at my upcoming book, Raspberry Pi for Computer Vision (Complete Bundle) where I’ll be covering the Google Coral in detail.
How do I use Google Coral’s Python runtime library in my own custom scripts?
Using the edgetpu library in conjunction with OpenCV and your own custom Python scripts is outside the scope of this post.
I cover custom Python scripts for Google Coral classification and object detection next month as well as in my Raspberry Pi for Computer Vision book.
Thoughts, tips, and suggestions when using Google’s TPU USB Accelerator
Overall, I really liked the Coral USB Accelerator. I thought it was super easy to configure and install, and while not all the demos ran out of the box, with some basic knowledge of file paths, I was able to get them running in a few minutes.
In the future, I would like to see the Google TPU runtime library more compatible with Python virtual environments. Requiring the sym-link isn’t ideal.
I’ll also add that inference on the Raspberry Pi is a bit slower than what’s advertised by the Google Coral TPU Accelerator — that’s actually not a problem with the TPU Accelerator, but rather the Raspberry Pi.
What do I mean by that?
Keep in mind that the Raspberry Pi 3B+ uses USB 2.0 but for more optimal inference speeds the Google Coral USB Accelerator recommends USB 3.
Since the RPi 3B+ doesn’t have USB 3, that’s not much we can do about that until the RPi 4 comes out — once it does, we’ll have even faster inference on the Pi using the Coral USB Accelerator.
Update 2019-12-30: The Raspberry Pi 4B includes USB 3.0 capability. The total time it takes to transfer an image, perform inference, and obtain results is much faster. Be sure to refer to Chapter 23.2 “Benchmarking and Profiling your Scripts” inside Raspberry Pi for Computer Vision to learn how to benchmark your deep learning scripts on the Raspberry Pi.
Finally, I’ll note that once or twice during the object detection examples it appeared that the Coral USB Accelerator “locked up” and wouldn’t perform inference (I think it got “stuck” trying to load the model), forcing me to ctrl + c out of the script.
Killing the script must have prevented a critical “shut down” script to run on the Coral — any subsequent executions of the demo Python scripts would result in an error.
To fix the problem I had to unplug the Coral USB accelerator and then plug it back in. Again, I’m not sure why that happened and I couldn’t find any documentation on the Google Coral site that referenced the issue.
What's next? I recommend PyImageSearch University.

30+ total classes • 39h 44m video • Last updated: 12/2021
★★★★★ 4.84 (128 Ratings) • 3,000+ Students Enrolled
I strongly believe that if you had the right teacher you could master computer vision and deep learning.
Do you think learning computer vision and deep learning has to be time-consuming, overwhelming, and complicated? Or has to involve complex mathematics and equations? Or requires a degree in computer science?
That’s not the case.
All you need to master computer vision and deep learning is for someone to explain things to you in simple, intuitive terms. And that’s exactly what I do. My mission is to change education and how complex Artificial Intelligence topics are taught.
If you're serious about learning computer vision, your next stop should be PyImageSearch University, the most comprehensive computer vision, deep learning, and OpenCV course online today. Here you’ll learn how to successfully and confidently apply computer vision to your work, research, and projects. Join me in computer vision mastery.
Inside PyImageSearch University you'll find:
- ✓ 30+ courses on essential computer vision, deep learning, and OpenCV topics
- ✓ 30+ Certificates of Completion
- ✓ 39h 44m on-demand video
- ✓ Brand new courses released every month, ensuring you can keep up with state-of-the-art techniques
- ✓ Pre-configured Jupyter Notebooks in Google Colab
- ✓ Run all code examples in your web browser — works on Windows, macOS, and Linux (no dev environment configuration required!)
- ✓ Access to centralized code repos for all 500+ tutorials on PyImageSearch
- ✓ Easy one-click downloads for code, datasets, pre-trained models, etc.
- ✓ Access on mobile, laptop, desktop, etc.
Summary
In this tutorial, you learned how to get started with the Google Coral USB Accelerator.
We started by installing the Edge TPU runtime library on your Debian-based operating system (we specifically used Raspbian for the Raspberry Pi).
After that, we learned how to run the example demo scripts included in the Edge TPU library download.
We also learned how to install the edgetpu library into a Python virtual environment (that way we can keep our packages/projects nice and tidy).
We wrapped up the tutorial by discussing some of my thoughts, feedback, and suggestions when using the Coral USB Accelerator (be sure to refer them first if you have any questions).
I hope you enjoyed this tutorial!
To be notified when future tutorials are published here on PyImageSearch, just enter your email address in the form below!

